Ars recently had the opportunity to spend some quality time touring the restored Apollo "Mission Control" room at the Johnson Space Center in Houston, Texas. We talked with Sy Liebergot, a retired NASA flight controller who took part in some of the most famous manned space flight missions of all time, including Apollo 11 and Apollo 13. The feature article "Going boldly: Behind the scenes at NASA's hallowed Mission Control Center" goes in depth on what "Mission Control" did during Apollo and how it all worked, but there just wasn't room to fit in detailed descriptions and diagrams of all of the different flight controller consoles—I'm no John Siracusa, after all!
But Ars readers love space, and there was so much extra information that I couldn't sit on it. So this is a station-by-station tour of Historical Mission Operations Control Room 2, or "MOCR 2." As mentioned in the feature, MOCR 2 was used for almost every Gemini and Apollo flight, and in the late 1990s was restored to its Apollo-era appearance. You can visit it if you're in Houston, but you won't get any closer than the glassed-in visitor gallery in the back, and that's just not close enough. Strap yourselves in and prepare for an up-close look at the MOCR consoles, Ars style.
The layout
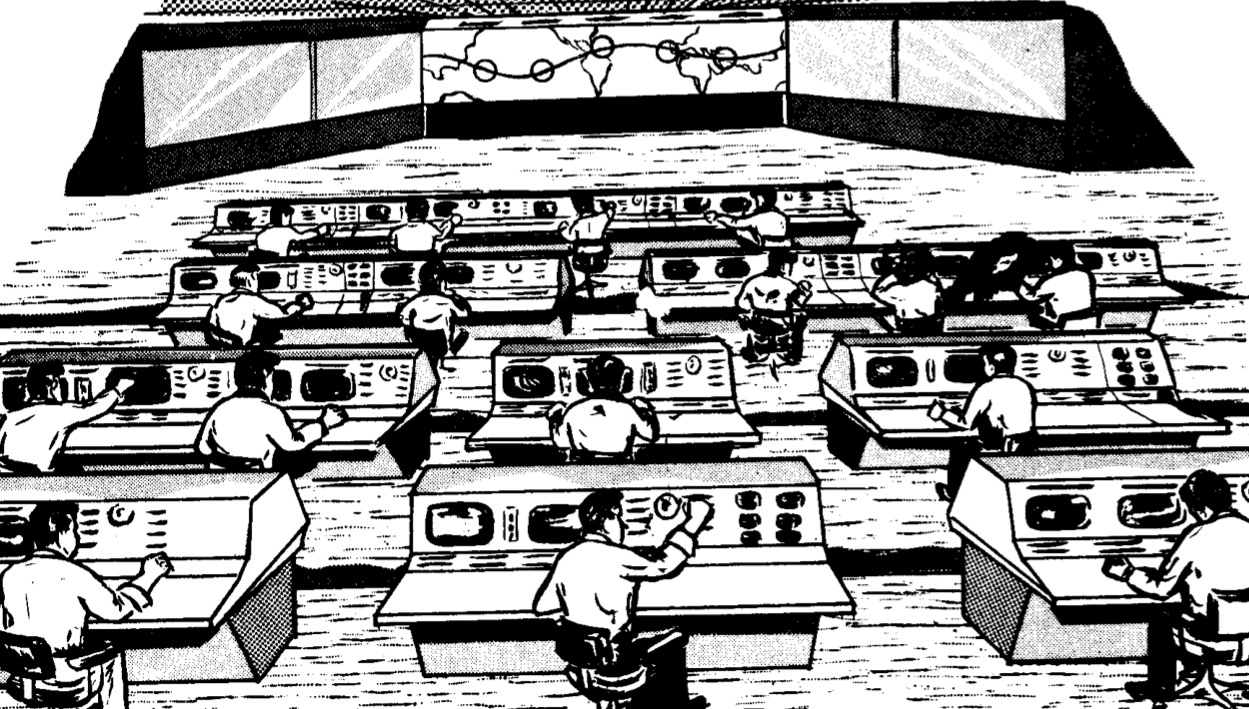
For most of Project Apollo, MOCR 2 had a fixed layout. Each station handled a specific, related group of functions; some watched over the spacecraft's hardware, or its software, or its position in space, or over the crew itself. Here's how things were laid out for most of Project Apollo:
Projection screens
MOCR 2 is dominated by five large rear-projection displays at the front, which are topped by nine smaller displays showing chronographic information. The large center display, called the "ten by twenty" by Sy Liebergot (it measures 10 feet tall and 20 feet wide) was primarily used to display the vehicle's position and status during the current phase of the mission, using a complex system of physical slides overlaid on plots or columns of numbers. Housed at several positions within the projection space behind the screens were powerful quartz-lamp Eidophor video projectors, which bounced images off of mirrors and up onto the screen surfaces.
The side screens could be used to display the same channels as the individual console screens; Sy noted that during Apollo, the left-most screens might be set to display the vehicle command history and the current page of the flight plan; the right-most Eidophor was used to display television images, either from cameras used during the mission or from network TV channels when needed. The mainframe-generated, slide-overlaid images the Eidophors projected up onto the screens were quite crisp and clear.
Row one - "The Trench"
The front row of controller positions is collectively referred to as "The Trench." It is, as Sy puts it, the "lowest and darkest" of the rows of consoles, being the closest to the big screens at the front of the room. The positions there were concerned primarily with what the spacecraft was doing and where it was going.
BOOSTER
On the far left of the Trench is the BOOSTER console. It was manned by three people during launch, and each person had primary responsibility for one of the massive Saturn V rocket's three stages. The BOOSTER controllers were of critical importance during the launch phase of each mission, monitoring the performance of each stage and ensuring that the complex launch vehicle functioned correctly throughout the approximately nine-minute ride to orbit, and then again during the trans-lunar injection phase, where the third stage reignited to send the Apollo spacecraft out of low Earth orbit and onto its trajectory to the Moon. After the maneuver was completed, the console was occupied by mission-specific scientific experiment personnel for the remainder of the flight.
RETRO
To the right of BOOSTER is the retrofire officer console, or RETRO. Where BOOSTER was responsible primarily for getting the spacecraft away from earth, RETRO was responsible for getting the craft back. RETRO kept a list of abort options—lists of procedures detailing what to do when things went wrong—during the return phase of the mission, and also kept track of the Apollo Service Module's main engine when it performed its burn to break free of lunar orbit and return to Earth.
FDO
Second from right is the flight dynamics officer console, abbreviated as "FDO" and pronounced "fido." FDO monitored the vehicle's trajectory at all stages of the mission. FDO is notable in that during Apollo, it was the only station other than the flight director which could directly call for a mission abort during launch, using a dedicated set of toggle switches. This heavy responsibility stemmed from FDO's role of watching over the vehicle's path; deviations from the preplanned launch trajectory could signal potentially catastrophic problems and would require swift and immediate action to make sure the crew was kept alive.
Even after launch, FDO's role was extremely important, as the Apollo spacecraft's trajectory was foremost on everyone's mind during all phases of the mission. Going to the Moon wasn't simply a matter of pointing the ship at the Moon's current position in the sky and firing up the engines; trajectories were delicately calculated loops around the constantly shifting bodies in the heavens, and changing the vehicle's path by mere fractions of a degree could mean the difference between a safe splashdown or a violent, crushing death during reentry.
GUIDO
The guidance officer, pronounced "guide-oh," watched over the Apollo Primary Guidance, Navigation, and Control Systems ("PGNCS," pronounced "pings" by some torturous acronym bludgeoning) on both the Command Module and the Lunar Module, and also had responsibility for the Lunar Module's backup Abort Guidance System ("AGS," pronounced "aggs"). GUIDO kept tabs on things like the velocity and vector reporting done by the onboard systems, and ensured that where the spacecraft's computers thought they were actually reflected reality.
During the landing phase of Apollo 11, a faulty checklist procedure resulted in the Lunar Module's PGNCS computer becoming overwhelmed with instructions and unable to do all that was being asked of it. The LM's master alarm sounded, and GUIDO Steve Bales and his back-room team had to decide whether or not to abort the landing. Within 30 seconds, they were able to determine the cause of the issue and that it was safe to proceed. This is yet another instance where a controller's intimate familiarity with spacecraft systems allowed them to quickly find the root cause of a complex issue and save a mission from a premature end.
Row two
The successive rows of consoles are elevated by about two feet. Stepping up from the trench takes us to the second row, which contains the infamous SURGEON console.
SURGEON
The far left console of the second row was SURGEON, occupied by a medical doctor—a flight surgeon—who monitored the health of the crew. His console usually displayed electrocardiogram and electropneumogram data, showing the astronauts' heart and breathing rates, as well as the output of other sensors attached on and around the astronauts' bodies.
It's a well-known bit of conventional wisdom that pilots—and hence astronauts—don't like doctors. The reason most often given is that a pilot can come out of a doctor's office in one of only two conditions: fine, or grounded. The enmity between the astronaut corps and the flight surgeons tasked with keeping them healthy and alive is quite well documented in popular culture; the craziness suffered by the Mercury astronauts in 1983's The Right Stuff isn't too far from reality, and the adversarial tone remained throughout Gemini and Apollo.
The tendency to hero-worship astronauts means that the folks manning the SURGEON console often got a bad public rap. It was head SURGEON (and later director of Life Sciences at JSC) Chuck Berry's recommendation to ground Apollo 13 crew member Ken Mattingly because he might have been exposed to the measles. This led to Jack Swigert's assignment to the mission very late in the training process, which greatly upset mission commander Jim Lovell. Flight surgeons, it seemed, were the causes of all sorts of problems for the crews.
Sy laughed when he recalled the Apollo-era SURGEON's role during missions. "He would show up 20 minutes before a mission, and he knew where the camera was in that corner, and he'd just stand up and comb his hair." He shook his head. "They were useless." He went on to relate a story that during a Gemini simulation, then-Flight Director Chris Kraft had one of the simulator technicians play a prerecorded electrocardiogram tape of a person undergoing an actual heart attack into the SURGEON console, then while it was playing queried the SURGEON desk as to the crew's health. "He said they were looking just fine!" snorted Sy.
CAPCOM
If the astronauts felt that SURGEON was the least useful station, then the next station over, CAPCOM, was the absolute opposite. CAPCOM, or "Capsule Communicator," was the only flight controller allowed to talk directly to the spacecraft's crew. This was done both from a resource management perspective, so that all transmissions to and from the spacecraft could be easily tracked for transcription, and also for crew safety, to make sure that the crew received explicit instructions from a single source. Only once in Gemini or Apollo did anyone other than CAPCOM address a crew, and that was during Gemini 4 when Chris Kraft, sitting at the flight director's console, instructed space-walking astronaut Ed White to terminate his spacewalk and return to the capsule. Kraft's violation of his own system of flight controller rules was due to White skirting at the edges of the mission's safety and time constraints in order to exceed the amount of time Soviet cosmonaut Alexey Leonov had spent spacewalking three months earlier.
The CAPCOM console was always occupied by an astronaut, in no small part to ensure that the spacecraft's crew always heard a friendly, well-known voice over the radio, Additionally, the astronauts brought with them a familiarity with the spacecraft's layout and operation and that was very useful, and it helped to have an astronaut to be able to describe things in "astronaut terms" to the crews.
EECOM
To the right of CAPCOM was EECOM, the Electrical, Environmental, and Communications controller. The "communications" part was removed from EECOM's purview after Apollo 10, leaving EECOM tasked with watching over the Command and Service Modules' electrical and environmental systems. This was a very broad range of responsibility, and when the shuttle program rolled around, the EECOM desk was broken down again into two separate stations.
EECOM, of course, was Sy Liebergot's primary console, from which he and the other EECOM operators monitored the generation and distribution of power on the spacecraft, as well as the critical life support systems—both the power-generating fuel cells and the living, breathing crew required oxygen to function, and EECOM tracked that.
GNC
One more station to the right was GNC, the Guidance, Navigation, and Control console. Where GUIDO managed the guidance computer and software of the spacecraft, GNC was responsible for the nuts and bolts hardware side of keeping Apollo pointed in the right direction. The GNC operator monitored the state of the reaction-control systems and the Service Module's main engine, as well as the hardware components of the spacecraft's guidance systems.
TELMU
TELMU, another tortured acronym standing for "Telemetry, Electrical, and EVA Mobility Unit," was EECOM's counterpart for the Lunar Module, watching over the LM's life-support and power systems just as EECOM did for the Command Module. The LM had no fuel cells, due to its incredibly tight weight restrictions, and so TELMU had to track the state of the LM's batteries during the landing phase of the mission. TELMU played a significant role in the implementation of the plan to use the Apollo 13 LM as a lifeboat, figuring out a way to solve a seemingly unsolvable chicken-and-egg problem of how to power up the LM during the mission's outbound coasting phase (a story which is detailed in the excellent IEEE article Houston, We Have a Solution, recommended by Sy as the most complete and accurate technical retelling of the Apollo 13 incident).
CONTROL
Just as TELMU was the LM's counterpart to EECOM, the CONTROL position was GNC's LM counterpart. CONTROL handled the hardware portions of the LM's guidance systems, including its landing radar, attitude thrusters, and ascent and descent rockets, while the LM's software and computers were under the purview of GUIDO down in the trench. (The Lunar Module and the Command Module used essentially the same computer with similar software, so one station handling both vehicles made sense on the software side of things). CONTROL is the right-most console on the second row.
Row three
Up another step sits another row of consoles. The standout station on row three is FLIGHT, where the proverbial buck well and truly stopped.
INCO
Starting again at the left, the first station is INCO, the Instrumentation and Communications Officer. Created as an additional position after Apollo 10, INCO monitored the communications systems for both the Command Module and the Lunar Module, taking these tasks from EECOM and TELMU respectively.
PROCEDURES
To INCO's right is the Organizations and Procedures console—PROCEDURES, or O&P, who made sure that controllers "followed all of our procedures when asking for data or communicating with people, all according to our flight control operations handbook," explained Sy. "As an EECOM," he continued, "if I needed a data printout or a voice playback recorded, I would have to fill out a particular form, putting in the GMT times—from, to—and what the subject was, and that would go through him."
Assistant FLIGHT
The assistant flight director is next, located to the left of the flight director. The assistant FLIGHT duplicated the flight director's duties, monitoring the mission and supplementing the flight director's control. "The Assistant flight Director sat here and did whatever the flight director wanted him to do," joked Sy.
FLIGHT
The flight director, FLIGHT, was the "orchestra leader," as Sy calls it. FLIGHT had ultimate authority to do anything necessary to ensure the crew's safety and the mission's success, in that order of priority. The concept of a central unimpeachable authority presiding over the mission came directly from an incident during the Mercury program where NASA management overruled Chris Kraft on a decision; during Gemini and Apollo, the only way for NASA management to countermand a flight director's orders was to fire him.
During launch, the flight director was one of only two consoles (the other being FDO) with the ability to directly request an abort, which would cause an "ABORT REQUEST" light to begin flashing inside the spacecraft, signaling the spacecraft commander to pull the ABORT handle. Depending on how far into the launch the ABORT came, this would cause any number of drastic actions, including the potential firing of the small Launch Escape System solid-fuel rocket attached to the Apollo capsule, which would yank the capsule off of the rocket and fling the crew roughly away to safety. Fortunately, a launch abort during Apollo was never necessary.
Other than the "ABORT REQUEST" toggle, FLIGHT's console was passive. FLIGHT would monitor displays and communication and coordinate the actions of all of the flight directors in Mission Control and ensure the mission was proceeding according to plan. He also kept detailed documentation of the mission's progress in a set of logbooks. FLIGHT kept continual tabs on all of the flight controllers and the crew, and often had to be paying detailed attention to several different things at once. In times of crisis, FLIGHT would gather together the recommendations of his staff of controllers and then decide on what action to take.
Another notable feature of FLIGHT's console is the event indicator panel above his left screen (panel #3 in the diagram above). This particular panel was hard-wired to show the status of all of the other MOCR flight controller consoles. Most famously, this was used when "going around the horn" before launch or a critical mission event, so that controllers could indicate a "go" if everything was fine or a "no-go," if they saw something anomalous. Sy explained that controllers also used their status indicator panels during a shift change, or when they had to step away from their consoles for a moment. "When we handed over... I would go amber," Sy said, punching the middle button, "and the flight director would say, 'Okay, guys give me an amber when you're on the console and give me a green when you're ready to brief on what happened the prior shift." The colored panel provided an immediately identifiable visual indication of whether or not the controllers were all at the ready. "He would know," said Sy, "that we were ready to go."
FAO
The flight activities officer, FAO, was the timeline manager for the mission. He sat to the right of the flight director and ensured that the preplanned activities for each mission were occurring on schedule. No small amount of spacecraft systems knowledge was necessary, since FAO had to be familiar with the contents of all of the mission checklists and needed to understand the amount of time involved in each step.
NETWORK
The right-most console on the third row is NETWORK, which functioned as the interface with the global network of MSFN data collection and transmission stations which served NASA. Not all of the ground stations were wholly reliable, and NETWORK often had his hands full ensuring that Mission Control was getting the data they needed; a downed computer at a site hundreds or thousands of miles away was NETWORK's problem to fix, and the controller was expected to keep the rest of Mission Control apprised of when things would be online again in the event of a failure. NETWORK's job didn't end there—he also had responsibility for data transmission inside the MCC complex, and even functioned as a kind of first-line technical support for the other consoles. "If we had a problem with a display, we'd talk to him," Sy recalled. "He had a really pressured job."
Row four
The top row of mission control was reserved for management and public relations.
PAO
Public relations played a tremendous part in the space program, and the Public Affairs Office had its own console, PAO, at which sat a controller who functioned as the "voice" of mission control to the public. PAO provided audio narration for the mission, which would be broadcast on radio and television. PAO commentary helped the public understand what they were seeing on their screens during the televised portions of a mission, and also gave news media something on which to base their own commentary.
"You see those guys quite a bit," jokes Sy, referring to the PAO desk, "Because the TV camera was up in that corner."
Flight operations director
The flight operations director desk was next. This desk played host to a senior Manned Spacecraft Center director, who functioned as an interface between Mission Control and space center management. During Apollo, this seat was often manned by Chris Kraft.
NASA HQ
This position acted as a liaison between the Mission Control team and NASA headquarters in Washington, DC. Sy noted that the HQ representative rarely had anything to do, but that there was usually someone there, watching the console.
Department of Defense
The final controller position, all the way to the right, was reserved for a representative from the Department of Defense, usually a general. The Department of Defense's presence in a civilian agency seems unusual at first glance, but the military was responsible for coordinating the recovery of the Gemini and Apollo spacecrafts after splashdown. The decommissioned console today sports a really cool red phone.
Inside the consoles
Not much of the original wiring and circuitry remains in the MOCR consoles today. NASA's original restoration plans for the room included wiring up each console with blinking lights, to give some vibrancy to the space and to "provide visitors with a realistic sense of what the control room resembled in operation during the Apollo Era timeframe." Sadly, there simply wasn't money available to enact that portion of the restoration plans, and though the MOCR 2 consoles today do contain a lot of Apollo panels, they are disconnected husks.
Do you want to know more?
For more on how "Mission Control" worked, make sure to check out the much longer companion piece, Going boldly: Behind the scenes at NASA's hallowed Mission Control Center.